Mailing lists are essential in order to utilize the Corefact system in the best way possible. Most agents have a geographic area where they focus their marketing efforts. We’ve built a platform that allows you to easily upload your target market database.
A mailing list is composed of three important parts. The data, the field name, and the file name. Here is the official Corefact guide on the smoothest way to upload your mailing list and explanations of the terms frequently used.
In order to optimize your mailing lists, you should have some experience with Excel. But don’t worry; you are fine if you’ve never used Excel. We’ll make this tutorial extremely easy to follow.
But I don’t have Excel.
That’s perfectly fine. There are plenty of alternatives to Excel. For example, Google Sheets is a free excel application that allows you to import/create the files you need.
But I’ve never used anything like Excel.
You’re still fine, but let’s take two seconds to get you up to speed. A spreadsheet is a universal term used among Excel-like application. It basically is the canvas you will be working on.
Spreadsheets Basic Overview
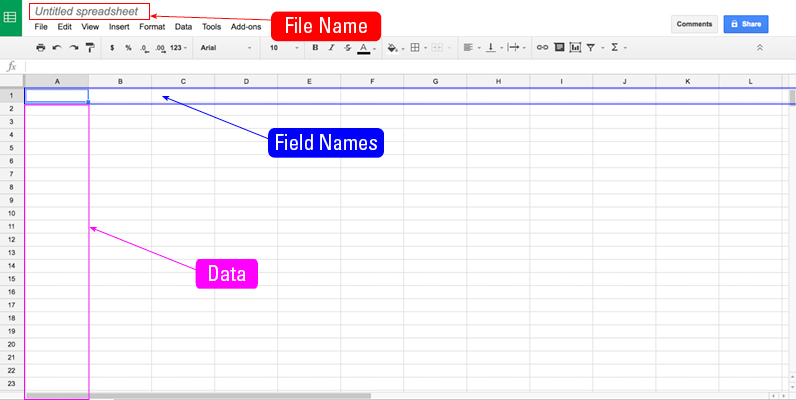
This is a spreadsheet. While the toolbars or side menus may be different depending on the application you are using, this layout is universal to the Excel alternatives.
Give your spreadsheet a File Name. A file name is what you wish to call your mailing list and allows you to keep your marketing efforts organized and segmented.
Typically your first row is where you put your field names. This row is used to give a title to the data points in this file.
Every row after your field names row is where you will keep your data. There are only three types of data you should worry about when it comes to mailing lists. Numerical data (such as a phone number or house number), dates (house sold date or last contact date), and/or words (street name or homeowner names).
Accepted Spreadsheet Filetypes
The Corefact mailing list system only accepts the following types of mailing lists. Those that end in .csv (Comma Separated Value) or .xlsx (Excel export). There is no limit to the file size of your mailing list.
Field Name Terms To Use
Your field names must match our field names in order to ensure the smoothest mailing list upload possible. Please note that you must use underscores ( _ ) instead of spaces. These are values you use in row 1 of your spreadsheet. Some values are optional and are denoted by having the color red.
first_name: The first name of the contact.
last_name: The last name of the contact.
site_address: The house number and street address of the house.
site_city: The city the house is located in.
site_state: The state the house is located in.
site_zip: The 5 or 9 digit zip code the house is located in.
mailing_address: The house number and street address of the homeowner.
mailing_city: The city the homeowner is located in.
mailing_state: The state the homeowner is located in.
mailing_zip: The 5 or 9 digit zip code the homeowner is located in.
bedrooms: The number of bedrooms the house has.
bathrooms: The number of bathrooms the house has.
sqft: The square feet of the house.
lot_sqft: The lot square feet of the house.
property_class: The property type of the house.
notes: Any notes about the house.
email: The email of the homeowner
phone: The phone number of the homeowner.
Corefact Spreadsheet Templates
The Corefact mailing list system only accepts the following types of mailing lists. Those that end in .csv (Comma Separated Value) or .xlsx (Excel export). In addition, there is no limit to the file size of your mailing list.
We have three templates available for you to download and edit:
Here is a .xslx file that will work on Microsoft Excel.
Here is a .csv file that is universally accepted among Excel alternatives.
Here is a Google Spreadsheet that can be copied to your personal profile.
How to upload your mailing list to Corefact
Now that you have your spreadsheet filled out, it’s time to upload it to your Corefact profile.
Step 1) Log into the Corefact store.
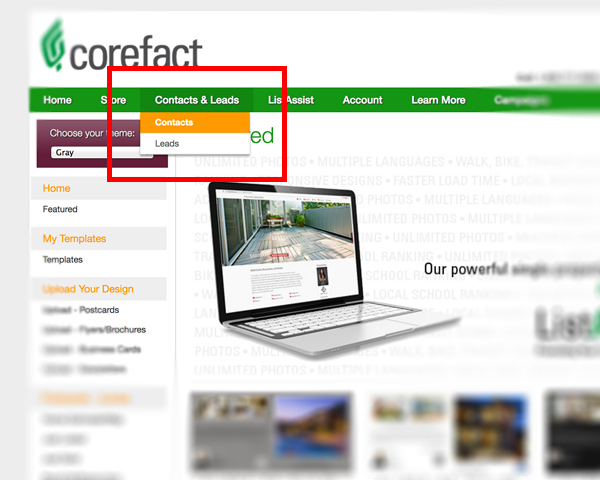
Step 2) Under the Contacts & Leads menu, select the Contacts link.
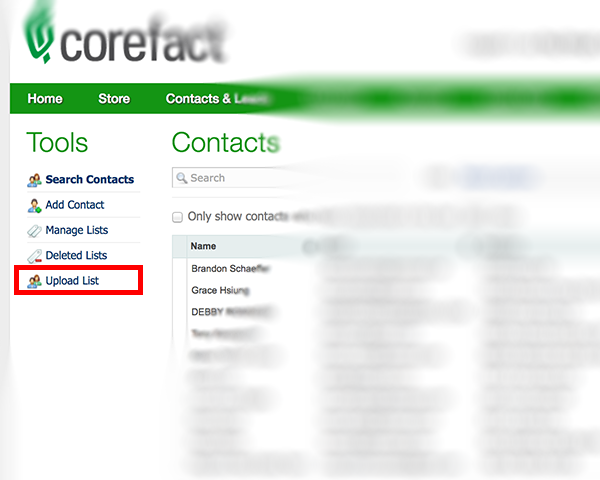
Step 3) Under the Contacts & Leads page, select the Upload List.
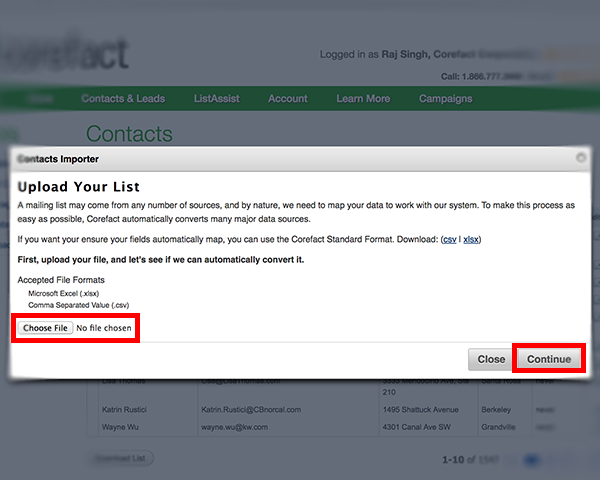
Step 4) Click on “Choose file” and upload your mailing list. Click on “continue”.
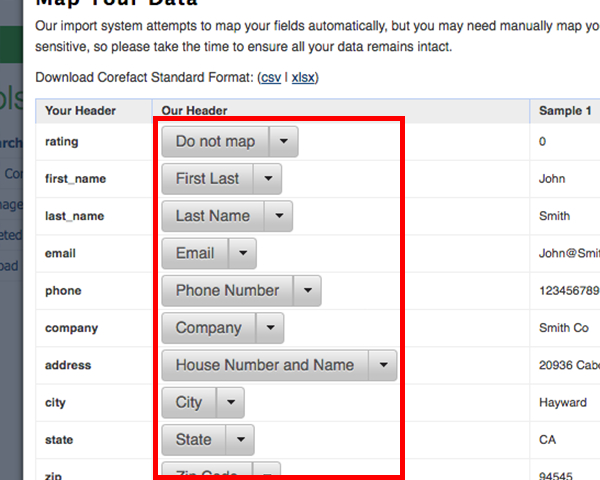
Step 5) On this screen, you will be able to assign your mailing list headers to our system. Simply select the correct field name that is linked to the data. If you’ve followed this guide and correctly named your headers, this step should be a breeze. 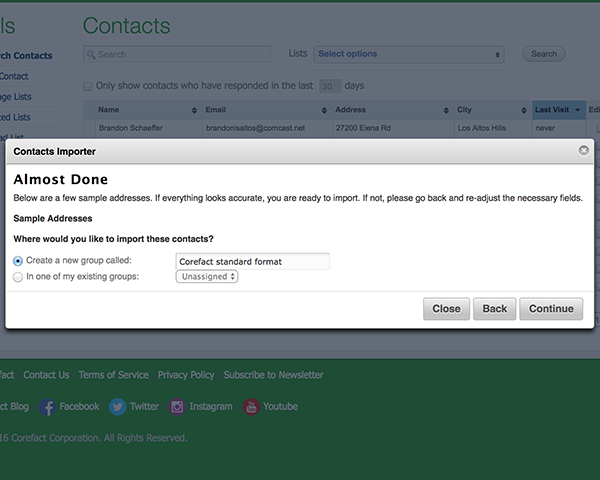
Step 6) Finally, give your mailing list a name. This is an excellent way to segment your targets in order to send targeted mailers.
And that’s it. You now have a segmented mailing list that you can use in order to send out targeted mailers. It’s recommended to connect with your farm list at least once a month. Now that you have a mailing list, here’s an excellent blog post about which mailers are best to send out.
